Step By Step Walkthrough Of Slingshot
1- Login/Sign Up Page
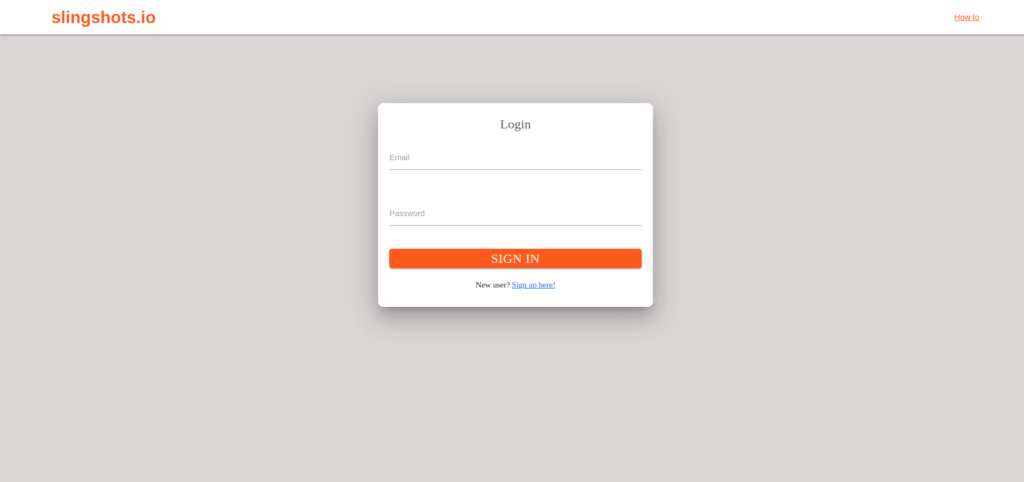
The user will land on the below page by using the link - https://slingshot.napses.in/
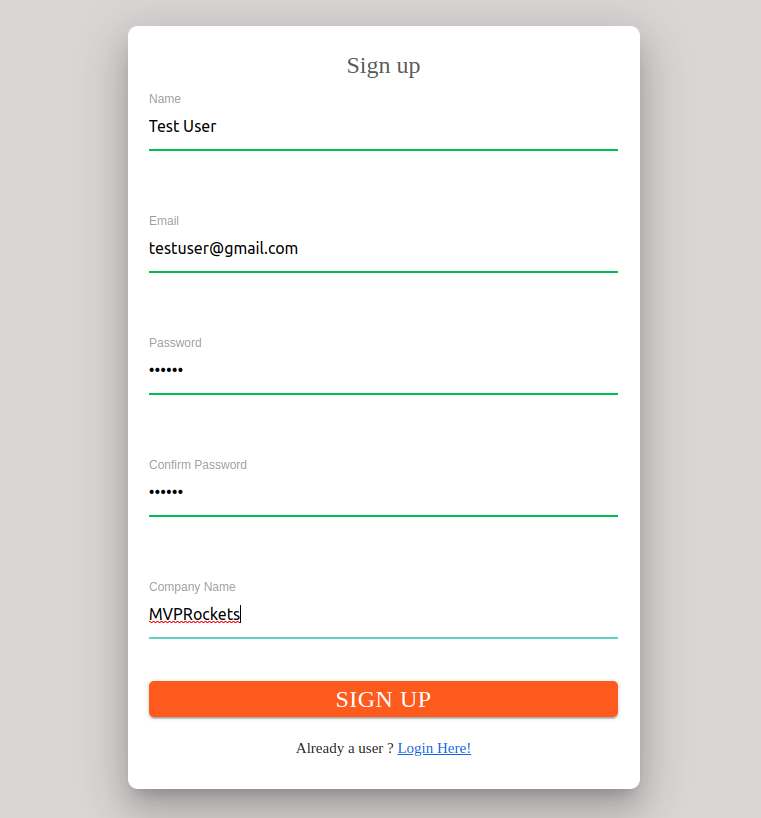
Below is the sign up page for the first time user, they can fill in their details here.
This is the login page for the already existing users.
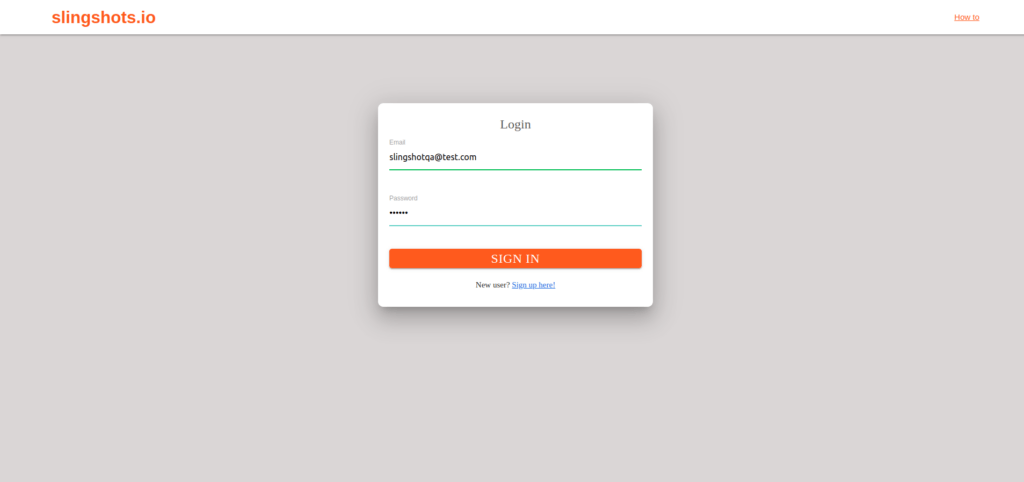
2- Entering Credentials
The user needs to login by using their credentials.
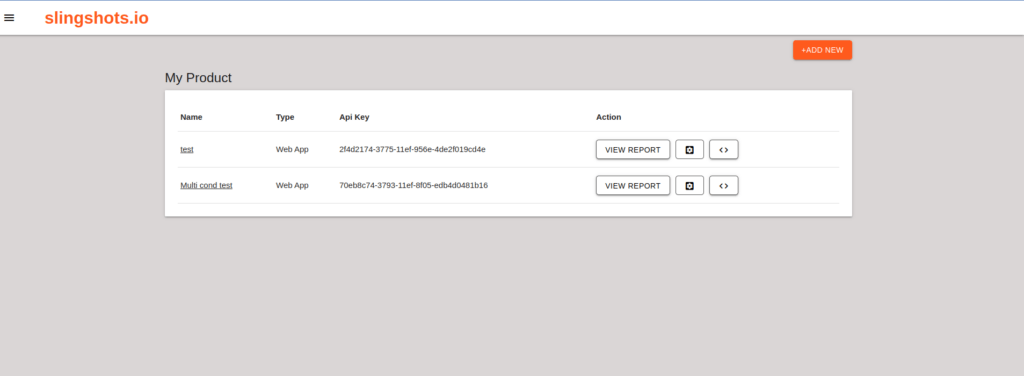
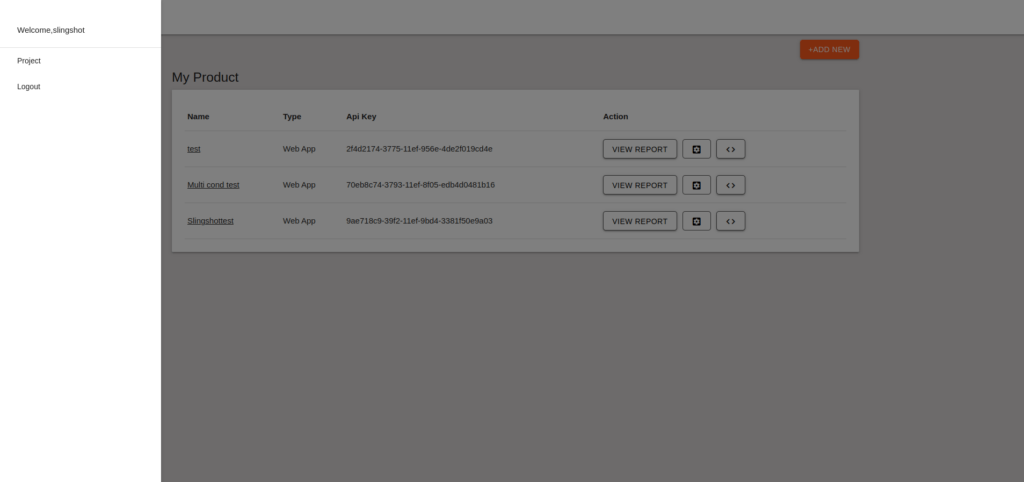
3- Homepage With List Of Existing Products
The list of already existing products will appear below.
4- By Clicking On The Side Bar The Following Options Will Pop Up
Users can Log Out or view projects by selecting the options in the bar.
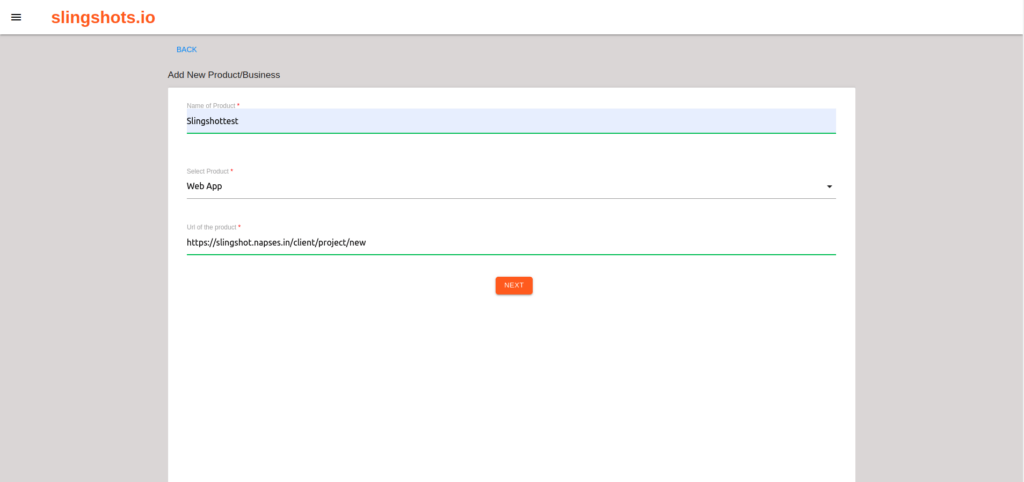
5- By Clicking On The Add More Button The Below Page Will Open Up
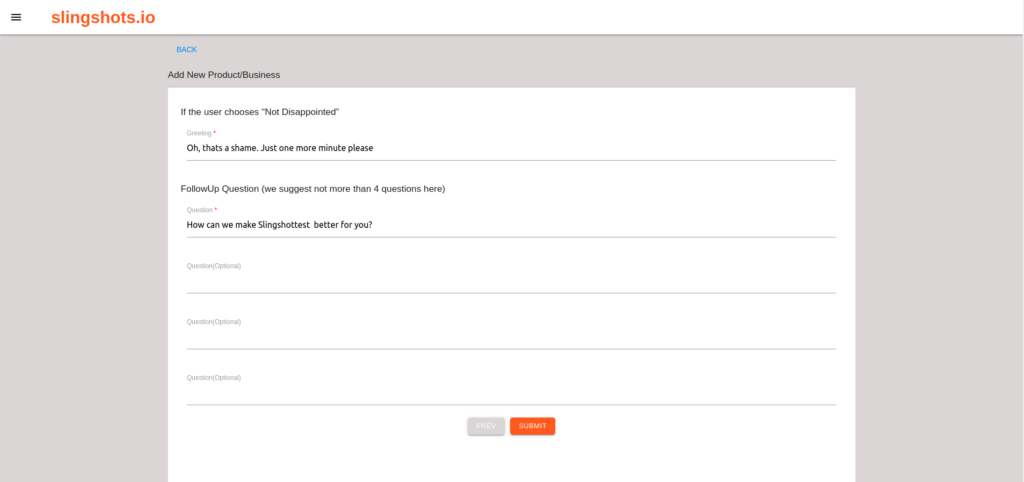
6- Page With Main Question
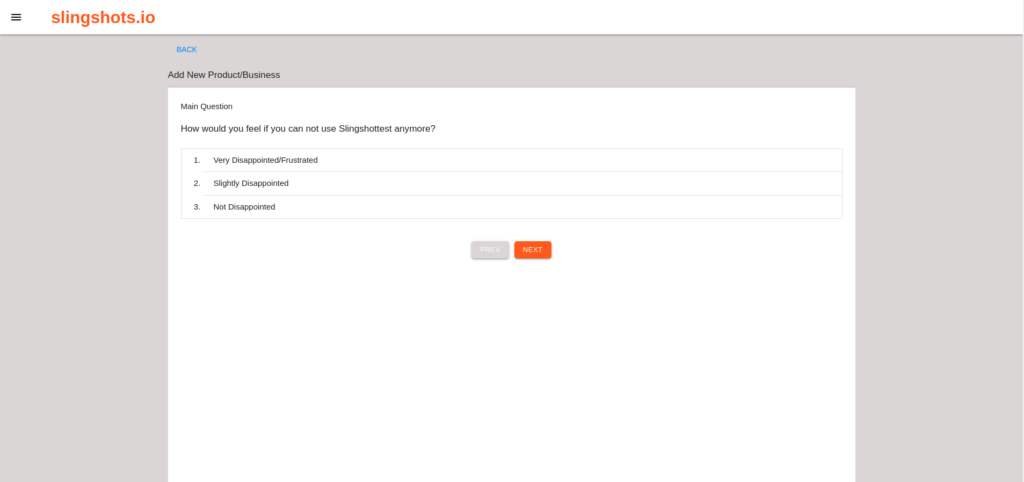
Users can modify the greetings/options available in the feedback.
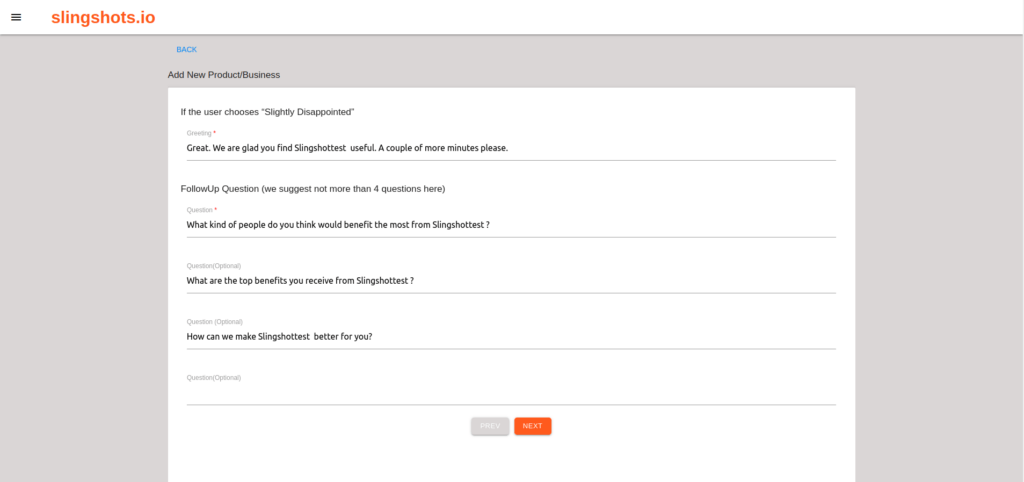
Users can add customized questions here
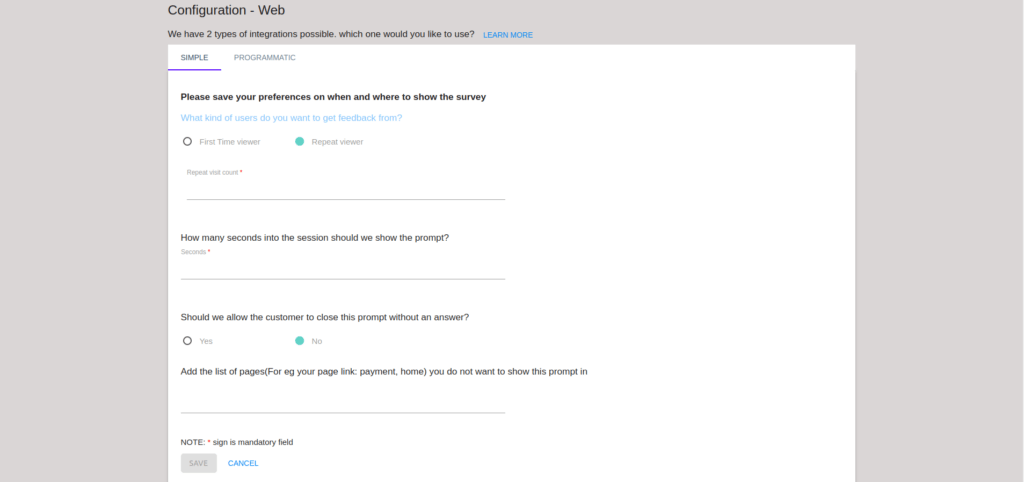
7- Simple Web Configuration
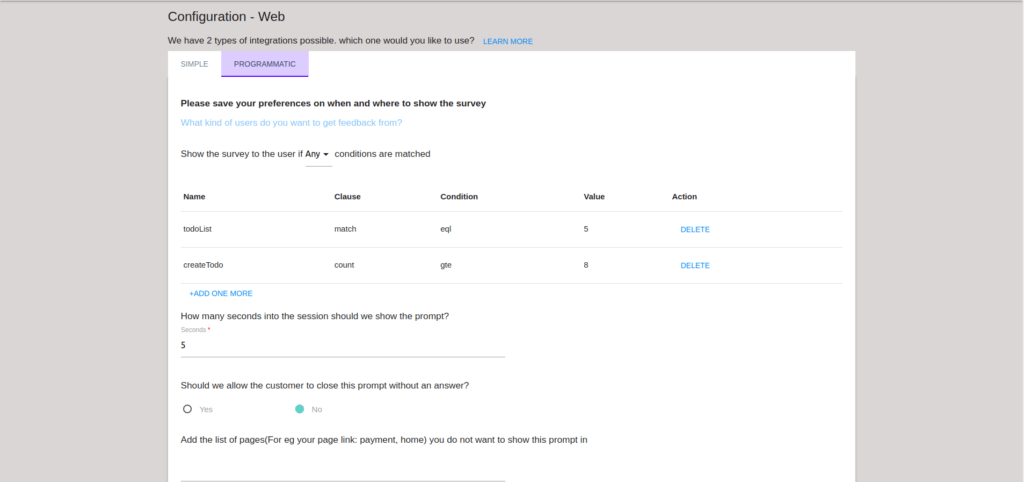
8- Programmatic Web Configuration
9- The Product Gets Created
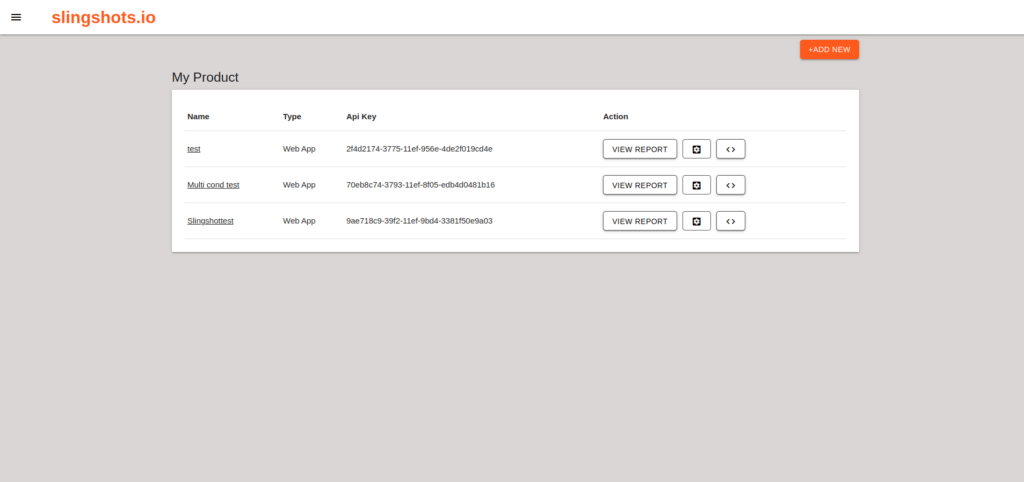
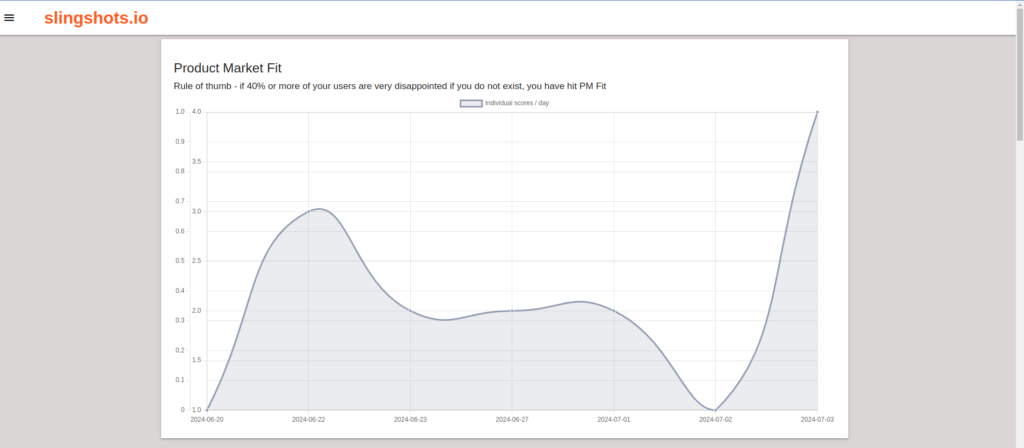
10- By Clicking On The View Report Button The Following Page Will Open Up
Product Market Fit Graph
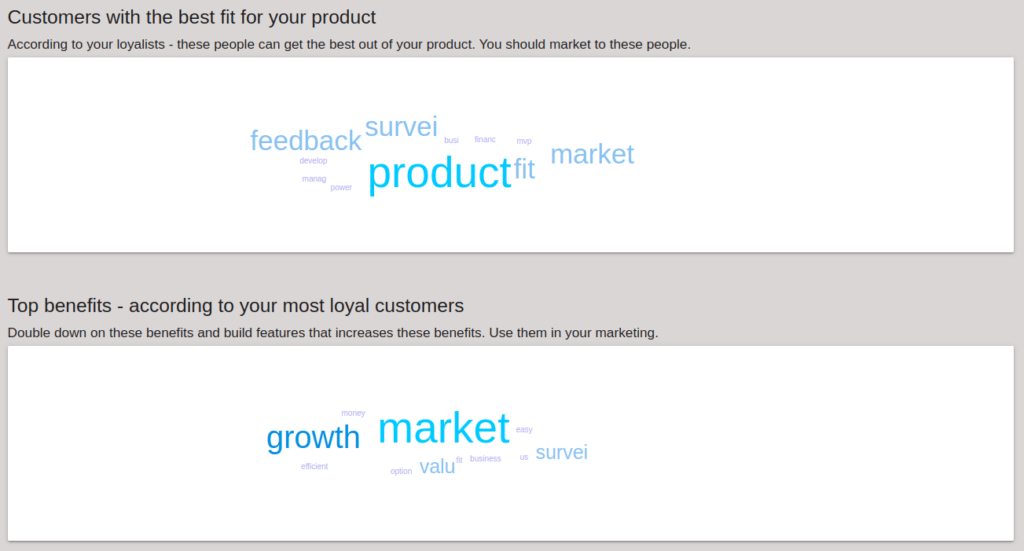
Word Cloud
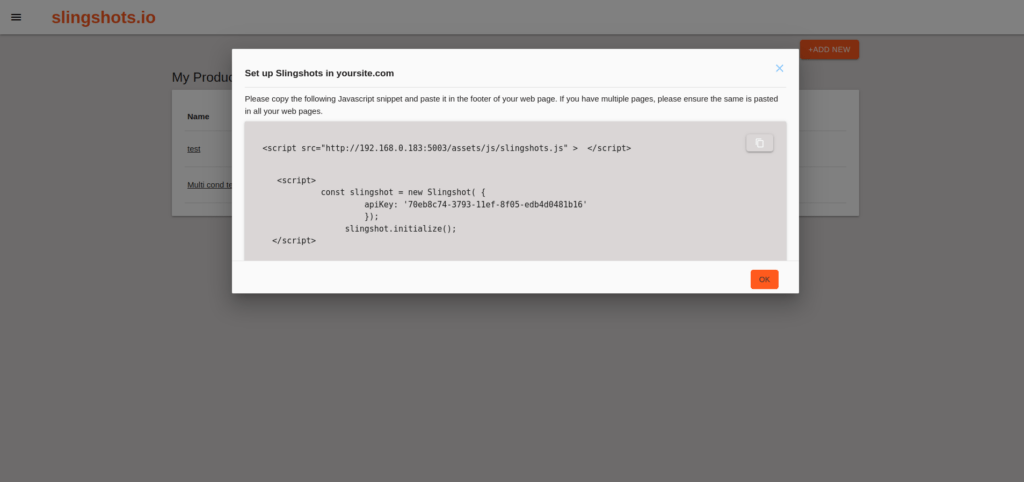
11- By Clicking On The Code Button The Following Snippet Will Open
Getting Started with Slingshot
Setting up a project and product survey form in Slingshot involves several steps to ensure customization and effective data collection.
Setting Up a Project
Accessing the Interface:
After signing up and landing on the homepage, locate and click on ‘Add New’ typically found in the top right corner of the interface.
Entering Product Details:
- Product Name: Enter the name of the product you are setting up the survey for.
- Type of Product: Select the appropriate category or type of product from the available options.
- Website Link/URL: Specify the web app or website link associated with the product.
Integration:
- Slingshot supports integration with multiple websites and applications, ensuring flexibility in how and where the survey is deployed and data collected.
Setting Up the Product Survey Form
Customising Responses
- Utilise the pre-designed list of questions tailored to discover product-market fit.
- Customise the response options based on the choices users make for these questions.
- For example, if the survey asks about user preferences, customise the options available for users to select from.
Adding Follow-Up Questions:
- Enhance survey depth by including follow-up questions to gather more detailed insights:
- Follow-Up Questions: These can be added to delve deeper into specific aspects that require more granularity.
Configuration
There are two types of configurations:
- Define your preferences on when and where to show the survey. By defining when to show the survey based on the no. of visits of a user and session seconds.
- Further customise the survey by defining if the user can skip from giving the survey and on which pages of your website the survey should not be displayed to the user, for their uninterrupted browsing, by providing links of those pages.
1. Define When to Show the Survey
- You can set a condition based on the number of times a user visits your website. For example:This condition ensures the survey is shown only after the user has visited your website a specified number of times.
- Event Name: Number of Visits
- Clause: Count
- Condition: Greater than or equal to [number]
- You can also show the survey based on the duration of the user's session. For example:This condition ensures the survey is displayed if the user's session duration exceeds a certain number of seconds.
- Event Name: Session Duration
- Clause: Match
- Condition: Greater than [seconds]
2. Customise Survey Interaction
- Decide whether users can skip the survey. This option is typically configured within the survey settings:Enabling this option allows users to dismiss or skip the survey if they choose not to participate.
- Skip Option: Yes/No
3. Specify Pages to Exclude
To ensure a seamless browsing experience, you can specify which pages on your website should not display the survey:
- Provide URLs of specific pages where the survey should not appear. For example:This ensures users are not interrupted with the survey on pages where it might be intrusive or irrelevant to their browsing context.
- Exclude survey on:
www.yourwebsite.com/page1
Implementation Example:
Let’s say you want to show the survey after a user visits your website at least 5 times and spends more than 60 seconds in a session. You also want to allow users to skip the survey, and you want to exclude the survey from appearing on certain pages:
- Condition 1 (Number of Visits):
- Event Name: Number of Visits
- Clause: Count
- Condition: Greater than or equal to 5
- Condition 2 (Session Duration):
- Event Name: Session Duration
- Clause: Match
- Condition: Greater than 60 seconds
- Skip Option: Enabled
- Excluded Pages:
- www.yourwebsite.com/contact-us
- www.yourwebsite.com/checkout
Programmatic:
1. Clause Options:
- Count: This likely refers to setting conditions based on the number of criteria met. For example, you might display a survey if a user has visited a certain number of pages or performed a specific action a certain number of times.
- Match: This probably refers to matching specific criteria or conditions. For instance, displaying a survey if a user belongs to a particular demographic or has specific preferences.
2. Condition Logic:
- All: This option likely means that all specified conditions must be met for the survey to be displayed. It ensures that only users who meet all the criteria will see the survey.
- Any: This option probably means that the survey will be displayed if any of the specified conditions are met. It offers flexibility, allowing the survey to be shown to users who meet at least one of the criteria.
These features are powerful because they allow you to tailor the survey’s appearance based on specific behaviours, demographics, or other criteria important to your research or engagement goals.
- We can add conditions by clicking the Add button, and will need to fill in a few details about the condition like - Event name, clause ( count/match ) and condition ( equal/greater ).
- Add Button: This button allows you to initiate the process of adding a new condition for when a survey should be displayed.
- Details to Fill In:
- Event Name: This likely refers to the specific event or action that triggers the condition for displaying the survey. For example, it could be something like "Number of pages visited" or "Time spent on site."
- Clause (Count/Match): You mentioned earlier that you have options like "Count" or "Match." Selecting one of these determines how the condition will be evaluated:
- Count:This might involve setting a numerical threshold, such as displaying the survey after a user has performed a certain action a specified number of times.
- Match: This could involve matching specific criteria, such as displaying the survey to users who meet certain demographic characteristics or behavioural patterns.
- Condition (Equal/Greater/etc.): This specifies the relationship between the event or action and the threshold you set. For instance:
- Equal:The survey displays if the event occurs exactly as many times or meets the exact criteria specified.
- Greater: The survey displays if the event occurs more times or exceeds the specified criteria.
- In the same manner we can add more conditions and can even delete the existing ones, other functions are exactly similar to simple configuration like adding the session seconds.
- Once the product is created an API key is generated which is used in integrating slingshot with customer application.
Installation
To install Slingshot into your product, follow these steps as outlined:
Steps to Install Slingshot
- Generate API Key:
- Complete the configuration settings in the Slingshot admin interface.
- Obtain the API key. This key will be used to initialize the Slingshot instance in your application.
- Add Code Snippet:
- Retrieve the code snippet provided by Slingshot. It typically looks like this:

- This snippet includes:
- Loading the Slingshot JavaScript library (slingshots.js) from a remote source.
- Initializing the Slingshot instance with your API key.
- Assigning the Slingshot instance to the window.slingshot global variable for accessibility.
- Inject Code Snippet:
- Insert this code snippet into the header section of your application's start file (typically index.html or the main layout file).
- Integration Verification:
- To verify integration:
- Open your application in an incognito mode or clear the cache to ensure the latest scripts are loaded.
- Test the functionality of Slingshot within your application to ensure proper integration.
To fire customized events based on specific conditions configured in Slingshot, follow these steps:
Setting Up Customized Event Configuration
- Configure Event in Slingshot Admin Dashboard:
- Log in to the Slingshot admin dashboard.
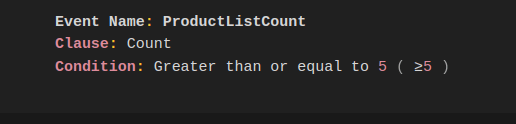
- Set up a customized event configuration:
- Event Name: ProductListCount
- Clause: Count
- Condition: Greater than or equal to 5 (≥5)
- This configuration defines that the ProductListCount event will trigger when the count of items in a product list is 5 or more.
Firing Customized Events from Your Code Base
- Trigger the Event in Your Code:
- Once the event configuration is set, you can trigger the event from your application's code base when the specified condition is met.
For example, if you have a product list and you want to trigger the ProductListCount event when there are 5 or more items in the list, you can do something like this:

- Ensure that window.slingshot.fireEvent('ProductListCount'); is called when the condition is met. This function call will notify Slingshot that the ProductListCount condition has been satisfied, allowing Slingshot to handle any configured actions or analytics associated with that event.
Verification
- Verify Event Triggering:
- Test your application to ensure that when the product list contains 5 or more items, the ProductListCount event is triggered as expected.
- Monitor Slingshot's admin dashboard or analytics interface to confirm that the event fires correctly and performs the desired actions or tracking.
By following these steps, you can integrate customized event firing based on specific conditions into your application using Slingshot. This allows you to leverage Slingshot’s capabilities to track and manage user interactions or conditions within your application effectively.
Customization
Slingshot’s flexibility in survey customisation is indeed valuable for tailoring surveys to specific needs and adjusting them dynamically based on feedback or changing requirements. Here’s how Slingshot facilitates this:
Modifying Existing Questions
- On-the-Fly Modifications:
- Users can modify existing survey questions as they proceed through the survey.
- This capability allows for real-time adjustments based on respondent feedback or specific contextual needs that arise during the survey process.
- Customisation Options:
- Users have the ability to edit the wording, format, or options of existing questions to better suit the evolving survey objectives.
- This ensures that surveys remain relevant and effective throughout their deployment.
Adding New Questions
- Seamless Integration:
- Slingshot allows users to add new survey questions seamlessly while progressing through predefined questions.
- This flexibility enables users to incorporate new inquiries based on emerging insights or specific respondent interactions.
- Immediate Implementation:
- New questions can be implemented instantly, ensuring that the survey adapts swiftly to evolving research goals or feedback requirements.
Analytics
Slingshot offers valuable tools for analyzing customer feedback! The techniques that we are using here —product market fit (PMF) graph and word cloud analysis—are quite effective for gaining insights from customer responses.
- Product Market Fit (PMF) Graph:
- This graph shows the count of feedback responses over different dates. It helps visualize how feedback is distributed over time, which can reveal trends or spikes in customer engagement. By analyzing this graph, you can identify periods of high or low feedback activity, which may correlate with specific events or changes in your product or service.
- Word Cloud Analysis:
- A word cloud is a visual representation of the most frequently used words or terms in customer feedback. The size of each word in the cloud indicates its frequency of occurrence. This analysis technique is valuable for quickly identifying common themes, issues, or positive aspects mentioned by customers. It provides a snapshot of the topics that are most prominent in the feedback, helping you prioritize areas for improvement or further investigation.
Combining these two techniques allows Slingshot to provide comprehensive insights into customer sentiment and preferences. The PMF graph offers a temporal view of feedback accumulation, while the word cloud highlights recurring themes and sentiments expressed by customers. Together, they provide a powerful tool set for understanding customer feedback and making data-driven decisions to enhance products or services.
Unlock Faster & Efficient Testing
Streamline your testing with TestPlum – record, save, and automate without the need for coding. Faster, smarter testing made simple.